»

Thursday, December 10, 2015

End Of Year Sale


Easy Blog Photo
Stampin' Up! End of year sale starts today. Just click on my " shop now" button and click on the " end of year sale" banner for details. Either go ahead and purchase online or email me -
( heather@stampingcraft.co.nz )your order. Items from the main catalogue are ONLY ON SALE ONE WEEK! So don't miss out.

Here's the lowdown...
During the Year-End Sale, you can find ALL discounted products in one location in the online store: under the Year-End Sale category. So don’t fret if you don’t see the category “Clearance Rack” on the online store right now--it has been integrated into the Year-End Sale. See the savings now!
Also, for one week only, get discounts up to 50 percent off select annual catalogue product!  This is only available in our South Pacific markets 10–17 December as a limited-time offering within the Year-End Sale (which will run until 4 January or while supplies last). See these products here!

Monday, November 23, 2015

Christmas 3D

I taught a pop-up card and Christmas Lantern box at my last Stamp Club class. Can you see that the ornament is adhered to acetate? That's to make it look like it is hanging midair. The Ornament of course was die cut using the Delicate Ornament dies. 


Saturday, November 21, 2015

Punch Art


Easy Blog Photo
This is a card I made for Emma's 18th birthday. I first found a cartoon pic of a car and then used Stampin' Up! punches to make punch art to complete the card. I free hand cut the ponytail of the driver. Emma's initials are ERM - hence the number plate. She was getting driving lessons as a gift

Saturday, October 24, 2015

Staff Leaving Card

I'm back!!
 One of our teachers at school was leaving to go back to Christchurch to live and this is the card I made.  I made it A5 size so that all staff had room to sign.

I was really happy with it, until someone told me the Hashtag is supposed to go at the beginning!!!

Duhh. Now I dont feel so smart. Lol.

Tuesday, June 2, 2015

New catalogue!!!!


http://su-media.s3.amazonaws.com/media/catalogs/2015-2016%20Annual/20150601_AnnualCatalog_en-AU.pdf


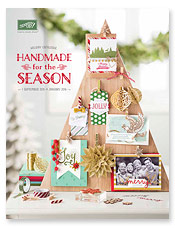
The new catalogue is live from today. Click on thre image above to browse. Email me if you would like a hard copy.

.


Monday, June 1, 2015

Hostess code

For anyone who can't make it to my catalogue launch on Jun 7th, here is the hostess code applicable from jun 2 nd to Jun 7 th. 49YASA2E

If you would like a copy of the new catalogue ( available for Jun 2 nd) please  email me ( my email details are in the header of this blog).

Cheers

Tuesday, April 21, 2015

this is it! THE retiring list


available WHILE  STOCKS  LAST to June 2nd

Click here to download the list of items that are reining from the Stampin' Up! annual catalogue.

I managed to load this before work!

Monday, April 20, 2015

Retiring List tomorrow!!


That all important time of the Stampin'Up! Year....

The New catalogue is imminent therefore..... Some of our product will be retiring.

We are all really interested to know what will be on the retiring list. Well the waiting will soon be over. The list will be out tomorrow ( April 21 st).

Some things on the retiring list will be heavily discounted so please be aware that some things will sell out fast. If you want to ensure you don't miss out, you will need to put through an online order via my website " shop now" button. The alternative is to give your order to me but run the risk of it selling out before I can put my next order through ( next order 6 th May).

The other thing is that now that I am working full time, I will not be able to publish the retiring list until tomorrow evening. If you can't wait, check it out on the Stampin'Up! Website
Stampin up!


Thursday, April 9, 2015

Magnetic Plate Special

Have you always wanted the magnetic plate for the Big Shot? Well now's the time to buy. This week only (till Tuesday 14th April) the magnetic Plate  (along with several other Weekly Deals) has been discounted from $83.95 to $62.96.

Buy online now by clicking the "shop now" button or email me your order. Dont miss out on this one!


Envelope box and card set

For this month's Stamp class we used SU note card and envelopes ( pg 194 of main catalogue) to make a boxed set of cards that we could give as a gift.


The cards and envelope were stamped using the Summer Silhouettes stamp set (pg 108 of main catalogue). The designs were based on an idea from Jacque Williams.

The colours used are; Crushed Curry, Elegant Eggplant, Old Olive and Bermuda Bay.


Friday, April 3, 2015

Bonus Bundles

For a limited time (Till April 17), Stampin' Up! are offering a 15% discount when you buy any of these bundles:)


http://su-media.s3.amazonaws.com/media/docs/SP%20Promotions/Bonus%20Bundles_April%202015/Flyer_BonusBundles_demo_April0115_NZ.pdf 

Thursday, March 26, 2015

Weekly deals and last chance SAB

Hi everyone
I realise some of you already have it but..

This week's weekly deals discounts the envelope punch board from $38.95   To    $29.21
Please let me know if you want to order one or anything else from either the deals (view by clicking shop now button on my blog) or from any current catalogue as I will be using the envelope punch board at my next stamp class and I will be putting in an order on Saturday 28 th March. This is also your last chance to earn SAB.

( my email is in my header above)

Thursday, March 12, 2015

Celebrate today

This is a card I made for my friend Julia's birthday this week. I CASed my card from 'Secret Stamper' Julia has a tabby cat called Jerry so I thought I would change the colour of the cat to look a little like him.
The stamp set was the Celebrate Today stamo set from the current mini.

Tuesday, March 3, 2015

Stamp Camp

Some more projects from Creative Inkers Stamp Camp;
This project was taught to us by the lovely Narelle Hoggard. Loving that Bouquet Bigz die (pg 30 Occasions Mini)
The Berry Basket was given to those of us at the Leadership meeting. Made by our awesome leader, Jacque Williams. The basket is covered in Something Borrowed DSP and adorned with the Butterfly from Butterflies Thinlits.
Our project taught by Jacque Williams.What an awesome gift made from the little school notebooks that are so cheap right now. I changed mine a little in that Jacque's project had two nbutterflies cut out and stacked on top of one another. For mine I lay the die on top of the two pieces of card and just cut through the top butterfly so that the bottom piec of card pushed up slightly into the spaces, giving a two tone effect. The little flower in the centre is from the Artisan Embellishment kit (pg 27 of Occasions Mini).

I am putting through an order on Wednesday March 4th so if there is anything you would like to order either put in an online order through my "shop now" button or email me:)


Monday, March 2, 2015

New classes


I am starting a beginners ( or new to me) class at my place, every second Monday of the month starting 9 March. Classes are 7-9pm two projects $15 per person per class. Please email your interest as soon as possible.( my email address is in my header, above) But for this event, I will do a two for $20 deal. So register for yourself and a friend and only pay $10 each. I need numbers by the Friday prior to class to ensure I have enough kits pepped:)

Extended Mini Treat Bag

This is way to alter the Mini Treat Bag to make it bag enough to fit a normal sized card;


1. Cut two Whisper White  rectangles 6” x 7 ¼” and score landscape at 3 5/8” then fold each on scoreline


2. Lay folded card with folded edge closest to you on cutting plate. Hold Mini Treat Bag die with larger rectangle closest to you and lay it on folded card, blade side down so that the folded edge of the card almost meets the cutting edge closest to you. NB it must not actually touch the blade edge. Repeat with second piece of card.

3. Open up the cards and with the zigzag edge at the top cut away the left bottom flap of one piece and the right bottom flap of the other piece. Fold the remaining flaps.

4. Overlap and align the two pieces of card by 4 full zigzags and adhere.  Fold the card pieces to meet in the front and adhere as per the back.

5. Put adhesive on flaps and then tuck into pouch and stick together.

6. With the Embossing folder ( arrows in my example) held landscape and the pouch held portrait, centre the EF over pouch and run through the Big Shot.

7. Decorate as desired.


Sunday, March 1, 2015

Sale-a-Bration additions

Wow, 4 addition FREE products have been added to Sale-a-Bration rewards.

From today till the end of March, for each $110 you spend, you can choose from the rewards in the Sale-a- Bration brochure plus the extra items added as below. Sadly though, Stampin' Up! have suspended sales of Blendabilities while they check out a quality issue (this includes the free blendabilites in the sale-a-Bration brochure. Hopefully this issue will be sorted very quickly and I will update here as more info comes to hand).


To put in your order email me or order online through my "shop now" button.

Ballon Bash Cut Out Card

As you will have gathered (if you have read previous posts), I taught at a last weekend's Creative Inkers Stamp Camp. I have shared already lots of the projects I made to showcase the Birthday Suite from the current Occasions Mini Catalogue. But now it's time to reveal the project I taught.

I wanted to design something that was a bit different to anything I had seen done with this set to date and to have one or two tips I could share with my fellow demonstrators.

this is the card I designed;

I showed then how ytou could Partially die cut the Balloonm shapes using the circle tag die from the Curvy Keepsake Box thinlits (there is also an oval tag that you could use with the oval shaped balloon). The trick is to make sure your top cutting plate partially covers the balloon to be die cut or elae the whole ablloon will pop out.
The little stars were punched using the Confetti Stars Punch (pg 45 of the mini)

Then I wanted to make a special envelope for the card. I thought of using the Mini Treat Bag but it was too small to fit a normal sized card. I then set about designing a way to extend the Mini Treat Bag to fit the card.

This is what I came up with;
Check back tomorrow for the instructions on how to extend the Mini Treat Bag.


Saturday, February 28, 2015

Birthday Suite

More Stamp Camp Projects;

Post it note holder in plastic holder. Birthday Bash DSP and Washi Sheet dies cut with BalloonFrametlit dies. Wanna know how to stamp on washi sheet? You could use Stazon but it would have to be black or white. I wanted Night of Navy so I stamped it and bvefore it rubbed off I went over it with a Night of Navy Blendabilities alcohol marker and "voila"!

Another Post It note holder. I partially die cut the balloon die on the top, folded it and attached a die cut balloon. The sentiment is the negative of a die cut glimmer paper word from the Mini Treat Bag Dies (pg 9 of the Occasions Mini).

More to share tomorrow...

Friday, February 27, 2015

Balloon Bash projects

If you read yesterday's post you will be (hopefully) eagerly waiting to see more Birthday Suite projects I made for Stamp Camp.

This is a litter bin for scraps when you have a workshop or just creating on your own. I covered a yoghurt container with Birthday Bash DSP. The Fast Fuse adhesive runner worked super well for this. The trim and letters were made with the new Washi sheets.
My name tag. The butterfly was the 2nd of the dies from Butterflies Thinlits (pg 26 of the Occasions mini) cut from the aluminium you get as a seal on top of large milo/coffee tins. I coloured my rhinestones with a Calypso Coral Blendabilities alcohol marker.
A little box with a bow made from the Bow Builder punch(pg 13 of the OccasionsMini and washi sheets. I suspended some tiny stars ( Confetti star punch pg 45) between two pieces of clear sticky tape for the little window.
 Another box I covered in Birthday bash DSP and trimmed with the washi sheets. With a bow made from the washi sheets also.

Inside the box I have a Happy Birthday banner I made with the Birthday Bash DSP punched with the 1 1/4" circle punch and the Balloon Framelits Dies (pg11 of the Occasions Mini). The letters were dies cut from the same DSP pack and the balloons were attached to Calypso Coral Bakers Twine with the Mini Metallic Clothespins (pg 209 of the main cattie). A little tip I shared was to press an adhesive sheet (pg 204 of main cattie) to the back of the DSP before die cutting then you can just peel the letters off and stick them straight down onto your project without the need for messy glues.


Come back tomorrow for more Stamp Camp projects:)


Thursday, February 26, 2015

Stamp Camp


If you ever considered becoming a demonstrator for Stampin' Up! , one of the best reasons is being able to attend exclusive events such as Stamp Camp. (click here to Join my team or email me for more details)

Last weekend, a group of over 50  demonstrators from the Creative Inkers team went to Rotorua for a weekend of fun, inspiration and frivolity. It is always fun to catch up with old friends while meeting new friends and putting faces to names. We always have a great time, eat lots (great meals provided plus  yummies we all took as well), learn new ideas, do a lot of crafting, and have a lot of laughs.

This year I taught the "Birthday Suite" (pages 10-13 of the Occasions catalogue.) Looks like just a few ladies watching but all 50 plus demonstrators were surrounding me.
This was me unloading all my projects that I had made with the suite. ( I made several projects but only taught 2)


 This is one of the projects I made. I am looking back over my shoulder as I show those on the stage behind me. Very big "THANK YOU" to my good friend Kelly for the idea and her help to complete it.

This is a glass vase marked off in sections made by cutting thin strips of the washi sheets then sticking them at regular intervals down the vase.the little stars are numbered at the intervals from 1-18. You would fill the vase/candle holder with wax melts to make a candle and give it as a gift to someone who has just had a baby. The idea is that on the first birthday you burn the candle to 1 (for 1 year old) then each year you burn it down to the next number etc and it becaome a family tradition until the child is Eighteen. Cool idea eh? I have stamped a sentiment on cardstock and attached it between the glass and the decorations so that the word "celebrate" is recvealed as the candle burns down.

Come back tomorrow for more projects:)