

Wednesday, February 24, 2010
 The Black and white cards we made;


Saturday, February 20, 2010
Challenge JA15

Every week there is new challenge on the "Just Add Ink" blog. You can enter by following the instructions on the site. Even if you don't want to enter, it's a neat place to visit for inspiration:) Just click on the link on the left of my home page. This is my entry for this week's challenge; Just add dimention.

All Stampin' Up! apart from earring clips. I used Silver Hodge Podge Hardware circle frame with one end cut off using craft scissors. I glued a large silver grommet to the centre with Crystal Effects then placed a large white half pearl from the Pretties Kit in the centre and adhered it with a large glue dot to a large white Jumbo Brad with the prongs cut off. (see back view)

Tuesday, February 16, 2010
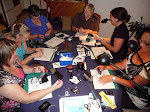
Black and White

I am having a Black and White card class on Friday (fully booked). I thought you might like a preview:) Will post full pics on the weekend. If you missed out and would like a repeat class, please leave me a comment or email me :)
Wednesday, February 10, 2010
Spotlight on VERSAMARK
. Stamp it on your project, cover with embossing powder (comes in black, white, clear, gold and silver) and heat to create that raised, glossy embossed look.
. Use the clear powder after stamping versamark over a pre stamped image (line up with a "stamp-a-ma-jig") and the pre stamped image colour will come through.
. Use it as a stamp pad to make watermark-like patterns - great for backgrounds on scrapbook pages (acid free).
. I haven't actually tried this myself ( I guess I should), but I have it on good authority that you can use it to with embossing powder to creat images on glass (and therefore other non-porous surfaces too, I guess). Leave a comment to tell me if you tried this.
. Stamp an image and then use a "dauber" to sponge "poppin' Pastels" over the image. The image will pop out like magic. If you want you can erase any unwanted chalk with the eraser that comes with the pastels.
Leave a comment, if you found this helpful.
Tuesday, February 9, 2010
Birthday Card
 This is a card I made today for a friend who loves cocktails.
The "glass" was made using Stampin' Up! Cardstock vellum. The main colour is "Kiwi Kiss". The background DSP is from the Simply Scrappin' kit "Hoppy Memories"
The card was inspired by a swap from Julia Leece and the cocktail recipe "Midori Splice"
If you would like the recipe, please leave a comment and your email address:)
Monday, February 8, 2010
Like my blog?
If you would like to be notified any time something new gets posted to my blog, please subcribe to my blog by clicking on the "Subscribe" icon on the right hand side of my blog. (you may need to click for a new page if prompted), complete your email details and encryption and then you will be kept up to date:)
Triangle Box Instructions
Well I have finally got around to this. Hope you enjoy:)
Cut a piece of cardstock (Certainly Celery) 8" x 4" (you can alter dimentions as you please).
Score a line down middle at 4" and make a mark at each end at middle (2").
Score diagonal lines from the 2" mark to the 4" mark at each end .(I have drawn in the scoring lines to show you).

Fold along all score lines.

Use horizontal slot punch to make ribbon holes and thread through ribbon.

For a more decorative box, roll the card with "So Swirly roller" using a darker ink (Old Olive) and punch through two layers (after folding in half down 4" line) with "Curly label punch".
Cut out appropriate sized pieces of acetate (clear plastic) and adhere to the inside before folding together.

Fill a small cello bag with chocolates (like Hershey's kisses), pop into the box, fold up and tie ribbon with bow. Stamp a butterfly from "Butterfly Prints", (Old Olive ink on Whisper White card), Summer mini and punch out with Butterfly punch also in Summer mini and attach to box with half a dimentional.
Moving circle card

Inspired by fellow demonstrator, Patrice Halliday-Larsen, I designed a moving circle card and taught it at this month's Stamp Club.
This is the completed card. Notice the tag just under the oval on the right hand side...

Turn this to reveal the circle underneath...

Turn full circle and you now have a completely different card:)
Tuesday, February 2, 2010
Tip of the Week
Stamp out ink onto scrap paper several times before cleaning stamps on Stamp 'n' Scrub to reduce the chance of picking up ink residue on subsequent stamps. (And cut down the need to wash your Stamp 'n' Scrub so often).
Subscribe to:
Posts (Atom)


