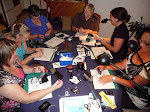
Some more projects from Creative Inkers Stamp Camp;
This project was taught to us by the lovely Narelle Hoggard. Loving that Bouquet Bigz die (pg 30 Occasions Mini)
The Berry Basket was given to those of us at the Leadership meeting. Made by our awesome leader, Jacque Williams. The basket is covered in Something Borrowed DSP and adorned with the Butterfly from Butterflies Thinlits.
Our project taught by Jacque Williams.What an awesome gift made from the little school notebooks that are so cheap right now. I changed mine a little in that Jacque's project had two nbutterflies cut out and stacked on top of one another. For mine I lay the die on top of the two pieces of card and just cut through the top butterfly so that the bottom piec of card pushed up slightly into the spaces, giving a two tone effect. The little flower in the centre is from the Artisan Embellishment kit (pg 27 of Occasions Mini).
I am putting through an order on Wednesday March 4th so if there is anything you would like to order either put in an online order through my "shop now" button or email me:)
Tuesday, March 3, 2015
Monday, March 2, 2015
New classes
I am starting a beginners ( or new to me) class at my place, every second Monday of the month starting 9 March. Classes are 7-9pm two projects $15 per person per class. Please email your interest as soon as possible.( my email address is in my header, above) But for this event, I will do a two for $20 deal. So register for yourself and a friend and only pay $10 each. I need numbers by the Friday prior to class to ensure I have enough kits pepped:)
Extended Mini Treat Bag
This is way to alter the Mini Treat Bag to make it bag enough to fit a normal sized card;
1. Cut two Whisper White rectangles 6” x 7 ¼” and score landscape
at 3 5/8” then fold each on scoreline
2. Lay folded
card with folded edge closest to you on cutting plate. Hold Mini Treat Bag die
with larger rectangle closest to you and lay it on folded card, blade side down
so that the folded edge of the card almost
meets the cutting edge closest to you. NB it must not actually touch
the blade edge. Repeat with second piece of card.
3. Open up
the cards and with the zigzag edge at the top cut away the left bottom flap of
one piece and the right bottom flap of the other piece. Fold the remaining
flaps.
4. Overlap
and align the two pieces of card by 4 full zigzags and adhere. Fold the card pieces to meet in the front and
adhere as per the back.
5. Put
adhesive on flaps and then tuck into pouch and stick together.
6. With the Embossing folder ( arrows in my example) held landscape and the pouch held portrait, centre
the EF over pouch and run through the Big Shot.
7. Decorate as desired.
Sunday, March 1, 2015
Sale-a-Bration additions
Wow, 4 addition FREE products have been added to Sale-a-Bration rewards.
From today till the end of March, for each $110 you spend, you can choose from the rewards in the Sale-a- Bration brochure plus the extra items added as below. Sadly though, Stampin' Up! have suspended sales of Blendabilities while they check out a quality issue (this includes the free blendabilites in the sale-a-Bration brochure. Hopefully this issue will be sorted very quickly and I will update here as more info comes to hand).
To put in your order email me or order online through my "shop now" button.
From today till the end of March, for each $110 you spend, you can choose from the rewards in the Sale-a- Bration brochure plus the extra items added as below. Sadly though, Stampin' Up! have suspended sales of Blendabilities while they check out a quality issue (this includes the free blendabilites in the sale-a-Bration brochure. Hopefully this issue will be sorted very quickly and I will update here as more info comes to hand).
To put in your order email me or order online through my "shop now" button.
Ballon Bash Cut Out Card
As you will have gathered (if you have read previous posts), I taught at a last weekend's Creative Inkers Stamp Camp. I have shared already lots of the projects I made to showcase the Birthday Suite from the current Occasions Mini Catalogue. But now it's time to reveal the project I taught.
I wanted to design something that was a bit different to anything I had seen done with this set to date and to have one or two tips I could share with my fellow demonstrators.
this is the card I designed;
I showed then how ytou could Partially die cut the Balloonm shapes using the circle tag die from the Curvy Keepsake Box thinlits (there is also an oval tag that you could use with the oval shaped balloon). The trick is to make sure your top cutting plate partially covers the balloon to be die cut or elae the whole ablloon will pop out.
The little stars were punched using the Confetti Stars Punch (pg 45 of the mini)
Then I wanted to make a special envelope for the card. I thought of using the Mini Treat Bag but it was too small to fit a normal sized card. I then set about designing a way to extend the Mini Treat Bag to fit the card.
This is what I came up with;
Check back tomorrow for the instructions on how to extend the Mini Treat Bag.
I wanted to design something that was a bit different to anything I had seen done with this set to date and to have one or two tips I could share with my fellow demonstrators.
this is the card I designed;
I showed then how ytou could Partially die cut the Balloonm shapes using the circle tag die from the Curvy Keepsake Box thinlits (there is also an oval tag that you could use with the oval shaped balloon). The trick is to make sure your top cutting plate partially covers the balloon to be die cut or elae the whole ablloon will pop out.
The little stars were punched using the Confetti Stars Punch (pg 45 of the mini)
Then I wanted to make a special envelope for the card. I thought of using the Mini Treat Bag but it was too small to fit a normal sized card. I then set about designing a way to extend the Mini Treat Bag to fit the card.
This is what I came up with;
Check back tomorrow for the instructions on how to extend the Mini Treat Bag.
Subscribe to:
Posts (Atom)